|
Latest News News Archives Interviews Mapping Contest |
||
| Maps | ||
| Download | ||
| Map Paks | ||
| Map Resources | ||
| Skies | ||
| Textures | ||
| Sounds | ||
| Prefabs | ||
| Tutorials | ||
| Editors | ||
| Links | ||
| .txt Gen | ||
| MapRid | ||
| Submit Map | ||
| Requirements | ||
| Testing How-To | ||
| Upload Map | ||
| FAQ | ||
| Forum | ||
| Top Maps (CLQ) | ||
| Death Match | ||
| Team Play | ||
| Search | ||
| Mailing List | ||
| AQMD Staff | ||
| Suggestions | ||
|
Sky Tutorial (Part 2 of 5) by [PnC]Muzma |
||
|
Next, the camera...
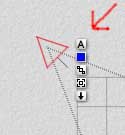
Select a view other than the camera’s view and select the camera itself. Go into the camera attributes (the little "A" seen right)
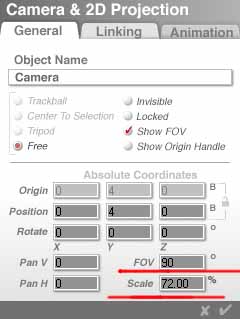
Set all the rotation axis’ to zero Set all the position axis’ to zero except the y axis. This is the height of the camera off the "ground". How high you put it is up to you, it depends on the sky you want and how it is meant to fit into the map. For example; I did a suburban sky and I wanted it to look like the ground and the players head/viewing height were in proportion, so setting y to 4 turned out to be the best. Over all there is not much need to go over 10 for this setting. Set the field of view (FOV) to 90 degrees Set the viewing scale to 72 percent.. These two settings are vital to making the finished product blend together, removing any "corners" from the sky. Once set, do not change them. (In case you’re wondering, it means that only 72 percent of the actual FOV is at 90 degrees. The rest is dragged in from ‘outside’ to fill the view, distorting things slightly. It’s similar to increasing the FOV in Quake2; since you can’t change the size of your monitor things get distorted. Confusing; hard to explain; but it works.) After all that the camera settings should look like this (with important stuff underlined in red)
Now, the one and only sky setting.
Got something to add or bitch about reagarding this page? Drop me an e-mail at [email protected]. |
| Newest Resources | ||
| New sky by GreyDeath | ||